
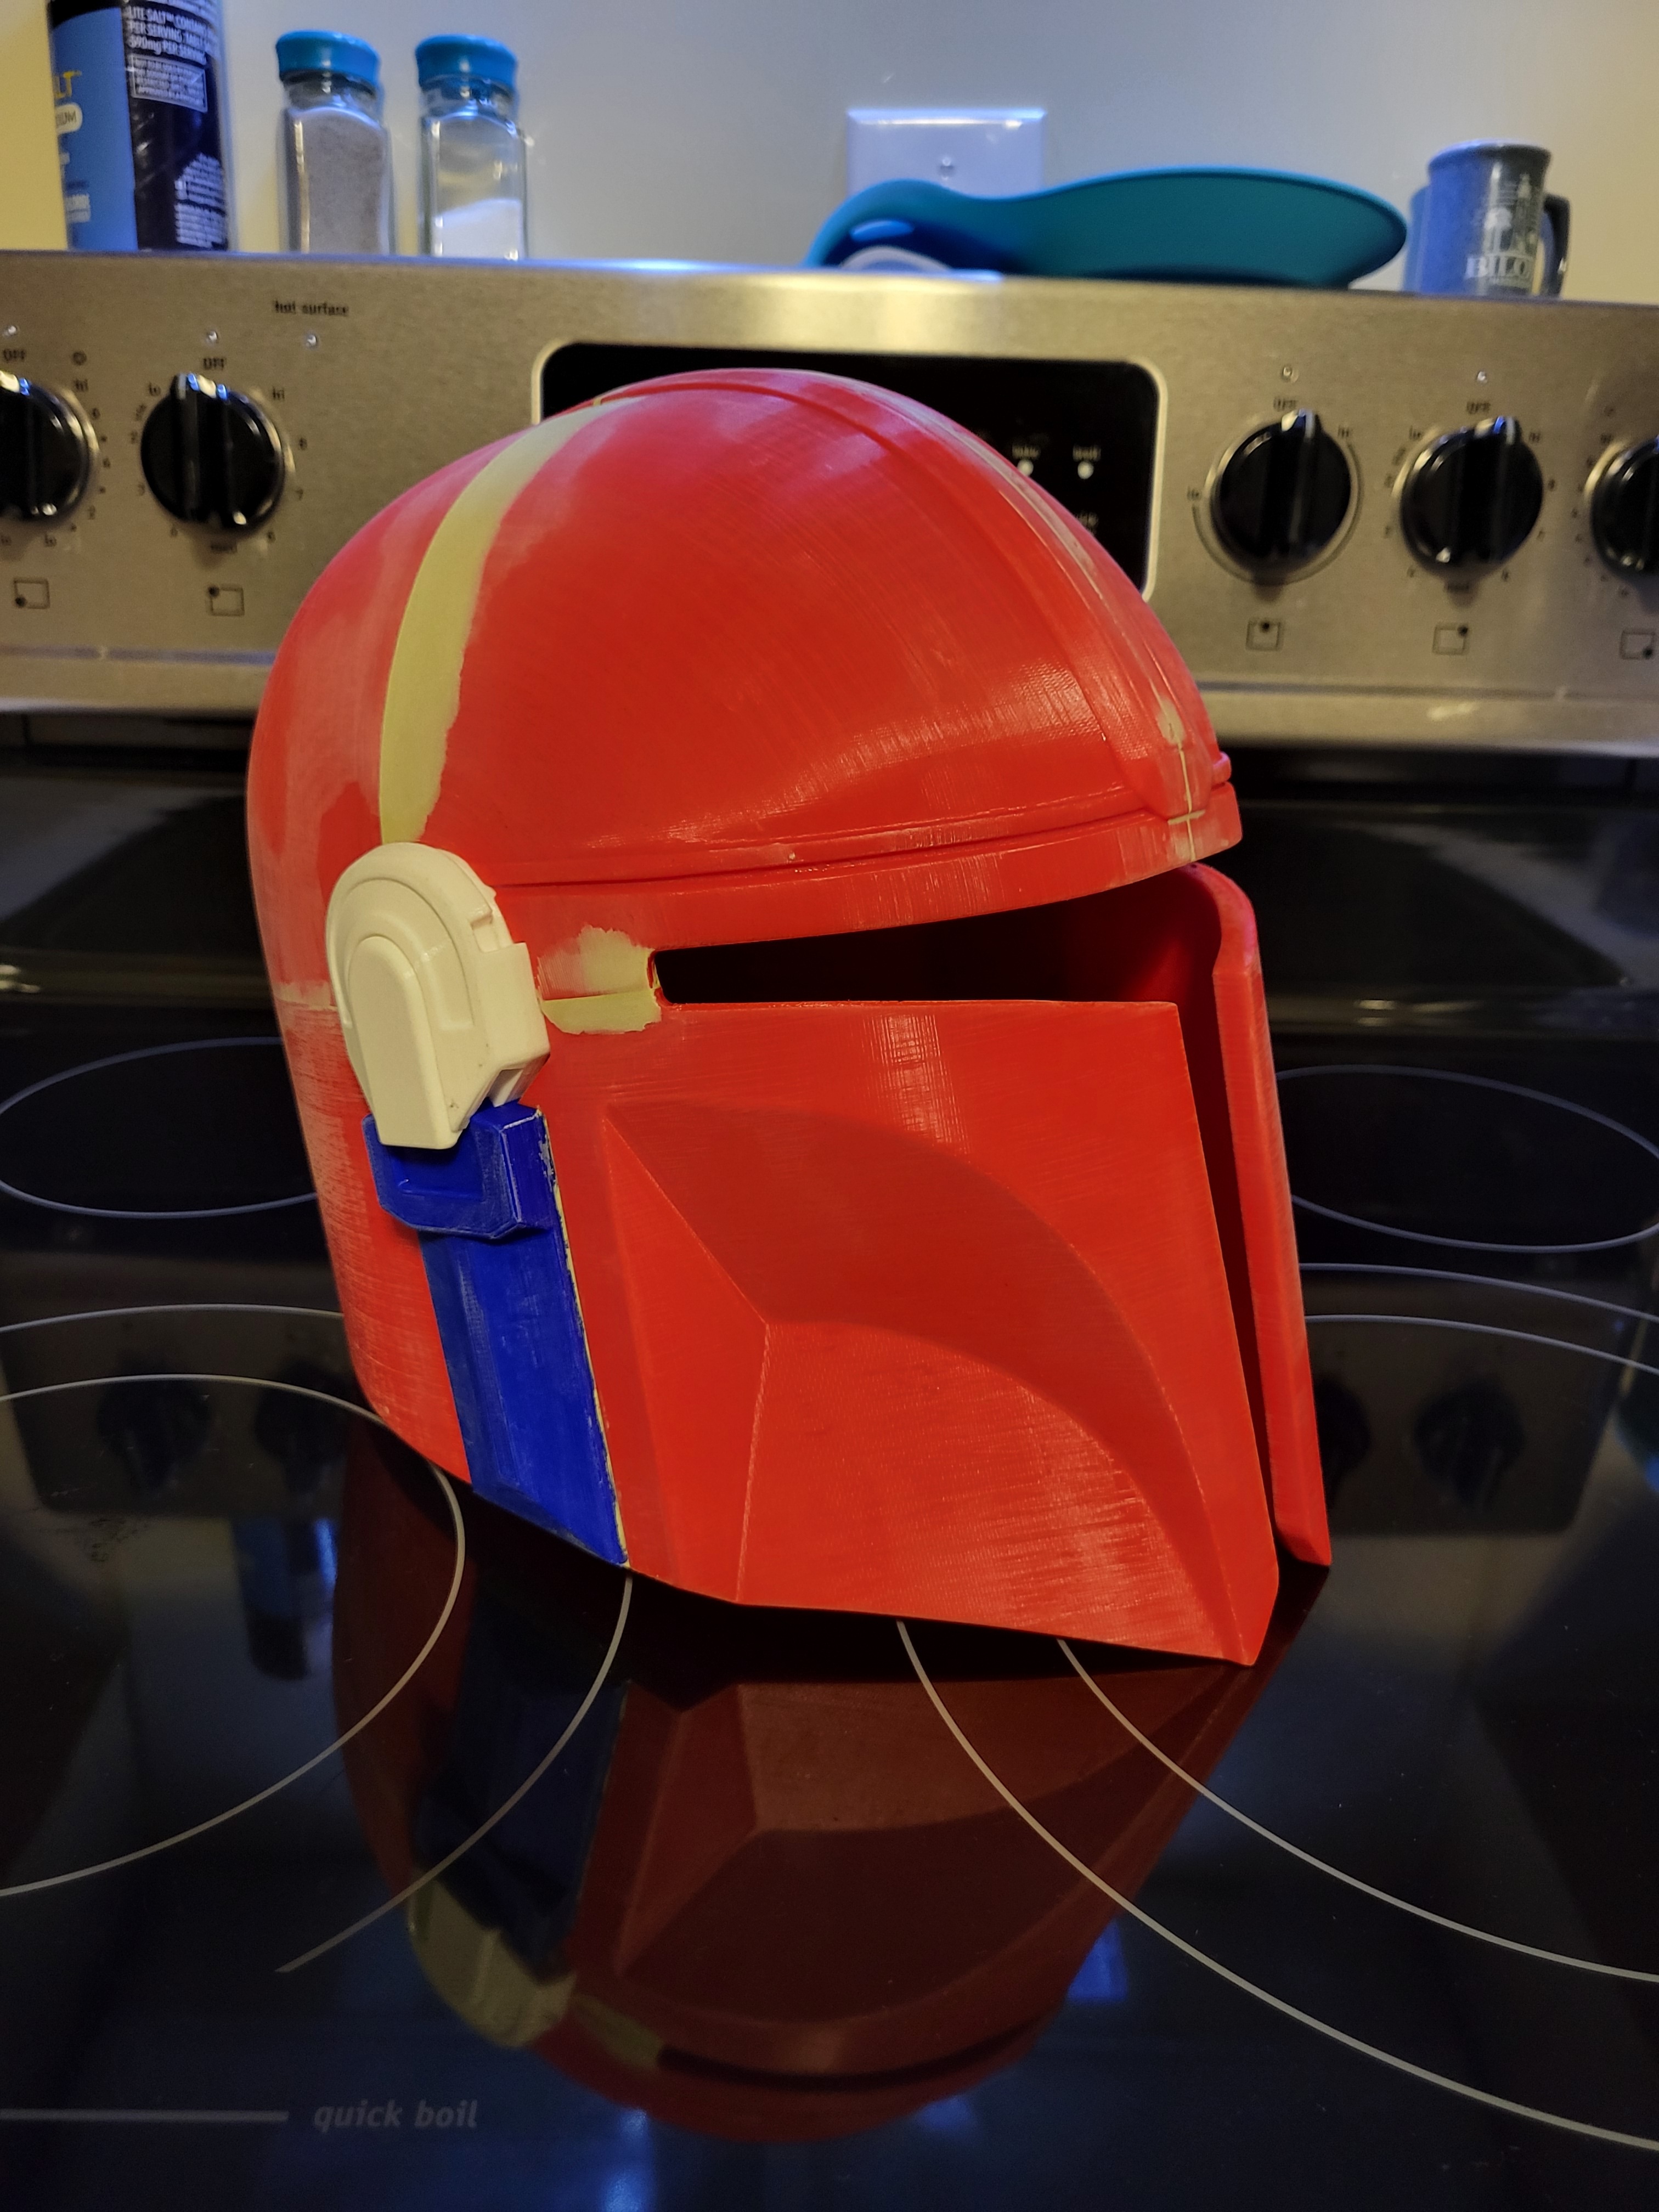
Had this thing printed months ago, but I procrastinated and finally got it put together. Just needs paint now.
Model: https://www.myminifactory.com/object/3d-print-mandalorian-helmet-v2-106137
Had this thing printed months ago, but I procrastinated and finally got it put together. Just needs paint now.
Model: https://www.myminifactory.com/object/3d-print-mandalorian-helmet-v2-106137
I was debating on giving it a worn/rough look. I still haven’t really decided. I think I’m going to shoot for a red/black theme with red being primary. Probably a darker red and I was thinking of using a matte black. I just am not sure about how I’m going to utilize the black.
Definitely going to be priming it tomorrow though. Then I need to run somewhere and pick out my colors.
Don’t want to push too much, it’s your project!
That said, some very light weathering will take it from “I just rolled off the clone trooper assembly plant” or “I’m a politician and I’m just wearing this armor because it’s expected,” to “space-badass”
It doesn’t have to be much at all, but a bit of a shiny wear spot would tell people “this is metal” without actually being metal.
Sealing is only really necessary if it’s going to be handled a lot- it coming off can be minimized by not using much to begin with and buffing it out sufficiently (I may cheat a bit and use a dremel buffing wheel,)- I’ve had good luck with minwax polycrylic clear coat and allclad through an airbrush.
Another way of adding some weathering effects is thinner down oil paint, brush in some black into cracks and remove with a cloth- like around muzzles on blasters, or maybe some machinist dye thinned out enough to give a bit of tempering-blue to things that might get hot.
You wouldn’t expect a madalorians EDC blaster or armor to be completely free of wear- even if they’re the most OCD about cleaning and maintenance. (And yeah, they’re probably pretty OCD…)
I appreciate all the tips, I’m not very artistic at all, and it probably would have looked a lot worse before everyone here commented lol. I want to do it right, so I probably won’t get it completely done before I take my kids trick or treating. So my current goal is to at least get it primed, sanded, and the base coat of paint on. I still have to cut the face shield I got, tint it and mount it inside. I saw some pics that gave me some ideas. Would you recommend velcro tape for the interior for foam pads and the face shield, so it’s all removable? Or do you have a better method?
So, when I made my helmet, I used barges cement for anything that still needed to be flexible.
Unless you’re going to be constantly removing the padding, it can be removed by heating with a heat gun or hair dryer.
It’s also great for EVA foam since it’s flexible, and the way it’s applied is by painting a thin layer on both pieces and the pressing them together after it’s dried for a few minutes (there’s a window where it’s dry but adheres to itself.) this means you can make a much neater join than CA (though CA is stronger if you need a rigid join… and can cure in seconds if you sprinkle baking soda or use accelerator.
If cosplay is something you want to get into, I’d recommend looking at EVA foam- kids can work with it if they can handle a hobby knife (or you can cut it out for them,) and it’s fairly forgiving. (Kids love it. Plenty of YT tips and tricks too
The most important advice is take your time, finishing touches are the last 5% that put it over the top. Filler primer is a godsend for smoothing and shaping though you may need to mask off fine detail- or clean it up with a toothpick run over the creases.
Between that, and masking things off are most of the work, so take you’re time. You can speed up paint drying with a hair dryer or heat gun (on low. Heat guns can melt PLA in a hurry,)- from over night to a few minutes.
Taking the mask off, you can run a craft knife or something over the edge to get a clean lift- more useful with enamel, lacquer or latex.
I’m better at the engineering and mechanical aspects- I once had an art teacher fail me in the fifth grade … in their defense that clay mask was truly awful. So all of this is stuff I’ve learned from others who are far better at it than I.
And remember… have fun! Especially with the kids.
Sand before priming. And make sure you use filler primer! Will help a LOT. You will probably go through 3-4 cycles of sanding, filler, sanding, bondo, sanding then paint lol.
I didn’t even know that was a thing, looks like I’m returning the primer I got. Thanks.
You bet! My crown here, is 3d printed. I did about 3 cycles of filler and sanding because I got impatient and rushed and you can still see the print lines. Still looks good overall tho.